Contact Kelly McNamara for information on products, services or locations.
Choosing an explosion-proof LED floodlight is not simply a matter of comparing wattage or price. The fitting must suit the classified area, the expected gas or dust hazards, and the site’s operating conditions. A label alone proves little. Check the product’s certification documentation, temperature rating, ingress protection, ambient-temperature range, and approved installation method. Requirements vary by location and application, so confirm them with a qualified safety professional.
For a transparent expert perspective, consider this illustrative quote from fictional hazardous-area lighting engineer Elena Ward: “A safe fitting is the one whose certification, temperature limits, and installation details match the actual site—not just the catalog description.” This is a composed example, not a sourced quotation or endorsement. Details matter. In the guide ahead, we’ll look at how to compare light output, beam angle, housing materials, heat control, maintenance access, and expected service life. We’ll also consider practical site details: a dusty ceiling, a corrosive washdown area, or a narrow mounting bracket can change what works. Not just brightness. A common mistake is treating “explosion-proof” as a universal specification; protection depends on the exact product approval and hazard classification. Fit comes first. Even a well-made light can be the wrong choice if its documents or installation conditions do not match the site. When uncertain, pause and verify the rating before purchase.
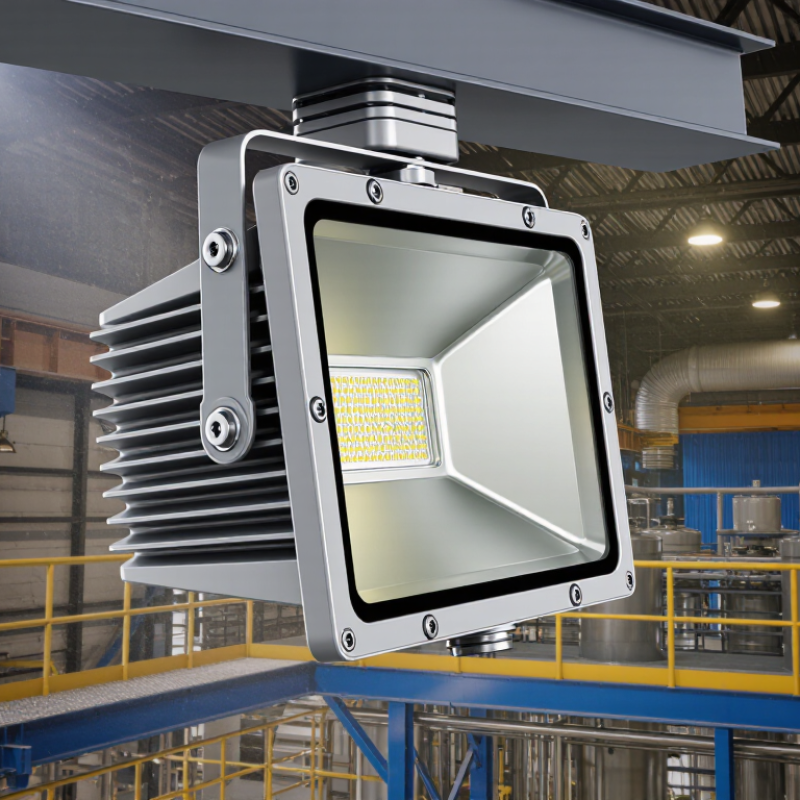
Before choosing an explosion-proof LED floodlight, identify the hazardous area using a documented site assessment. IEC 60079-10-1:2020 classifies explosive gas atmospheres as Zone 0, 1, or 2; IEC 60079-10-2:2015 uses Zones 20, 21, and 22 for combustible dust. Zone 0 means gas is present continuously or for long periods. Zone 2 means it is unlikely during normal operation and, if it occurs, lasts briefly. Small details matter. A solvent drum station and a dusty grain-transfer point need different assessments.
Match the fixture’s protection level to the zone, substance, and installation conditions. IEC equipment protection levels include Ga, Gb, and Gc for gas hazards, and Da, Db, and Dc for dust hazards. Check the gas or dust group, temperature class, ambient-temperature range, and certificate markings. The fixture’s maximum surface temperature must remain below the substance’s ignition temperature. An IP rating helps describe dust and water ingress; it does not establish explosion protection. In practice, classification drawings may be incomplete, so verify them against actual processes and maintenance records.
Tips: Ask a qualified hazardous-area professional to confirm the zone and equipment marking before purchase. Photograph the nameplate. Check that its certificate covers the intended gas or dust group, temperature class, and operating conditions. Revisit the assessment when processes change. Small oversights happen.

Start with the work being done, not the fixture’s advertised wattage. Check the target illuminance for the task, then estimate how many delivered lumens are needed across the floor or equipment. A dimly lit inspection bench needs different coverage from an open loading area. Mounting height, obstructions, wall color, and dirt buildup all affect the result. Ask for photometric data and review the beam pattern at the planned mounting height. The first estimate is rarely perfect.
Beam angle determines where light lands. A narrow beam can reach a high platform or highlight a specific work zone, but may leave dark edges. A wider beam spreads light more evenly across a broad area, though it can create glare or waste light beyond the task. Mark the work area on a simple plan and compare beam coverage before choosing. Check for shadows around pipes and machinery, too.
Choose color temperature for visibility and comfort. Around 3000K often feels warmer, while 4000K to 5000K can make details and surface contrast easier to see in many work settings. Higher is not always better; glare and worker preference matter. If possible, assess a sample under actual operating conditions. Keep the selected fixture’s hazardous-location rating suited to the installation, and verify its output, beam, and color data before purchase.
Verify that the certification covers the exact light model and intended hazardous-area classification. A label alone is not enough. Check the certificate and product documentation for gas or dust group, temperature class, permitted ambient temperature, and approved cable entries. These details must match the site assessment. A small mismatch can matter. Certification applies to a tested configuration, so changing glands or mounting parts may affect suitability. Do not guess.
Environmental ratings answer a different question. An IP rating describes resistance to dust and water; it does not prove explosion protection. For an outdoor loading bay, consider driving rain, fine dust, salt air, vibration, and temperature swings. Check the fixture’s stated operating range, corrosion resistance, and surface-temperature limits. An LED driver can also have operating limits that are easy to overlook. Read the full specification, not just the headline rating. If documents conflict, pause and ask a qualified electrical or safety professional to confirm the rating against the site conditions. It is easy to miss one detail. That deserves a second look.
Compare Materials, Durability, and Power Options
Choosing an explosion-proof LED floodlight starts with the actual site conditions. Check the required hazardous-area rating against the equipment documentation and local standards. The housing material matters, too. Coated aluminum is lighter and resists corrosion, while stainless steel can suit harsher, damp environments. Lens material and seals deserve attention; a strong housing cannot compensate for a cracked lens or poorly protected cable entry. Small details count.
Durability is more than a thick casing. Look for clear temperature limits, ingress protection, vibration resistance, and accessible maintenance instructions. These specifications should match the installation, not just look impressive on paper. Power options also affect reliability. Fixed AC supply can work well for steady lighting, while low-voltage systems may simplify certain installations. Solar-powered units can help where wiring is difficult, but sunlight, battery capacity, and operating hours need realistic checks. More power is not always better; excess brightness can create glare and waste energy.
Tips: Compare fixture ratings with the site assessment, then check replacement parts and service access. Confirm voltage, cable compatibility, and mounting strength before installation. One easy detail to miss is the aiming angle; test it at night if practical. No single material or power source fits every site.
Choosing an explosion-proof LED floodlight starts with the actual installation conditions, not just the required brightness. Confirm that its hazardous-area classification, temperature rating, and enclosure protection match the site’s gas, dust, moisture, and ambient heat. A fitting that looks robust may still be unsuitable. Check the mounting surface, beam direction, and clearance for future inspection before ordering.
Cable entries deserve careful attention. Use glands and seals specified for the luminaire, and make sure cables are supported without pulling on the terminals. A qualified installer should follow the product instructions and site procedures, including grounding and isolation requirements. Keep the certification label readable after mounting; it can save time during later inspections. Small details matter.
Plan maintenance before the light goes into service. Set inspection intervals based on operating hours, dust, vibration, and corrosion, rather than relying on a calendar alone. With power safely isolated, inspect the lens, enclosure joints, fasteners, and cable entries for cracks, looseness, or moisture. Clean the lens with a non-abrasive cloth; harsh cleaners can cloud it. Record changes in brightness or repeated condensation. A checklist helps, but it cannot catch everything—workers familiar with the site may notice a subtle shift first. Replace damaged components only with approved parts, and never treat a quick repair as a substitute for checking the original installation conditions.